 |
 |
 |
 |
 |
 |
|
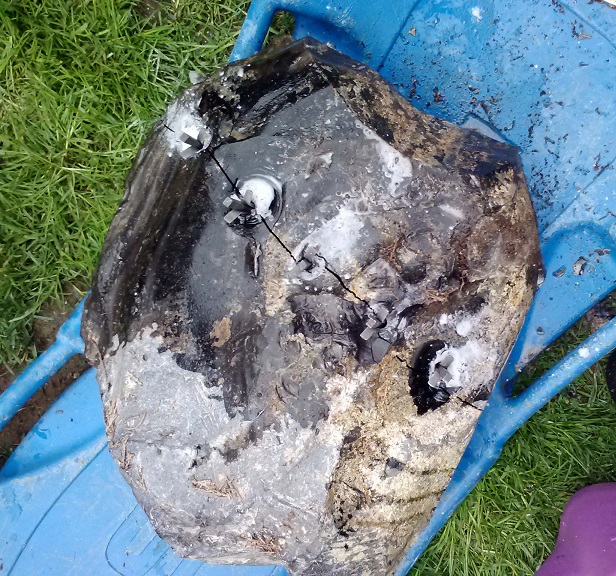
Splitting Obsidian with 'Feathers and Wedges' PSK Style Splitting large chunks of Obsidian has always been a challenge for those of us who visit Glass Buttes and the surrounding areas of Oregon to obtain knappable material. While finding large pieces of obsidian isn't all that difficult, collecting it using only hand tools (no mechanical aids or explosives as per BLM regulations), can be a challenge. But with a little motivation and ingenuity, even that obstacle can be relatively easy to overcome. The greatest challenge for most of us is what to do with large pieces of obsidian (and other large knappable rock) once we get it out of the ground and to a place where we can work on it. Unless one has access to arguably the greatest spaller of all time, Emory Coons, getting the most out of a large chunk of obsidian requires a very larges diamond slab saw costing thousands of dollars. And even then much of the obsidian is still too large for even 36" saws, which are rare and forget about the 18" - 24" saws. They aren't nearly up to the task of slicing up 250 pound pebbles of raw obsidian. Several PSK members including Harvey Hughett, Henry Payne, Jim Keffer, Woody Woodside and now Joe Higgins have been working with 'Feathers and Wedges' to split large chunks of obsidian. The technique is really quite simple. First obtain a set (usually 5 sets) of feathers and wedges (a 'set' is two feathers or shims and one wedge), of an appropriate size. For most manageable obsidian chunks the 3/8" set is more than adequate. A hammer drill, 3/8" carbide rock bit and some water are all that is needed besides the feathers and wedges. First mark a line where you want to split the rock - a chalk line works great. The 'split line' can be straight or curved. Next drill 3/8" diameter holes just as deep as your wedges are long and 4" - 6" apart along the split line. Using water to cool the drill bit and clean out the holes will speed things up and prolong the life of the drill bit. Insert the feathers (shims) into the hole and then insert the wedge between the feathers. The 'tabs' or 'ears' of the feathers should be perpendicular to the split line. Starting at one end tap the first wedge just hard enough to seat it firmly. Repeat for all the remaining sets. Once all wedges are seated start with the first wedge and hit it once then repeat in sequence. You don't need to hit the wedges particularly hard - a firm tap in sequence will do the job on four or five series of taps. Sometimes waiting a minute or two after just a couple of sequential taps will allow the rock to split. We're working on a video and will be posting photos and a PowerPoint presentation within the next couple of weeks. Here is a Rainbow Obsidian pebble that Woody Woodside split using the Feathers and Wedges. Note the line of holes in the first photo. These were drill as outlined above and you can clearly see the split that developed between the holes.
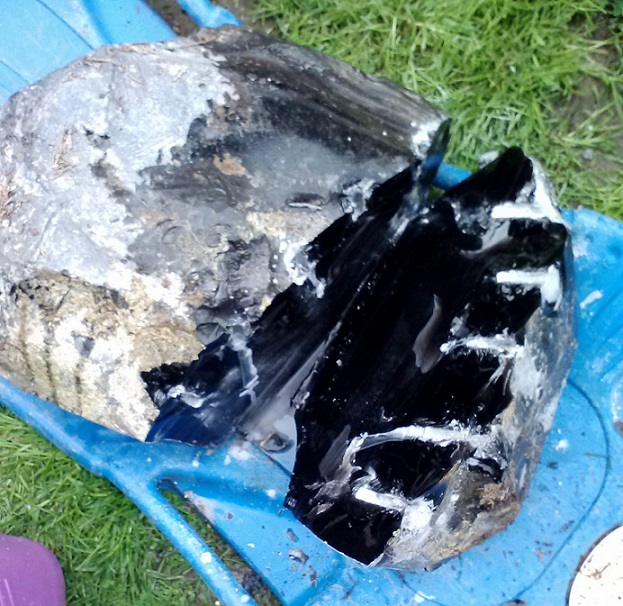
The split pebble - the depth of the drill holes, just slightly deeper than the Feathers, is the key to producing a clean split without damaging the rock. Deeper holes can result in fractures caused by excessive hammer drilling and they can also result in uneven splitting.
|
|
©2010 J Keffer |